|
The trim system on a GT Pro (also Sport C, SST 60, and others) racing boat generally consists of a single cylinder located along the boats centerline. Of course, if your motor already has an OEM trim system, that would presumably do the job.
The tricky part of this setup is attaching one end of the hydraulic cylinder to your OMC GT Pro motor. No one manufactures a bracket for this purpose. So it becomes a real do-it-yourself project.
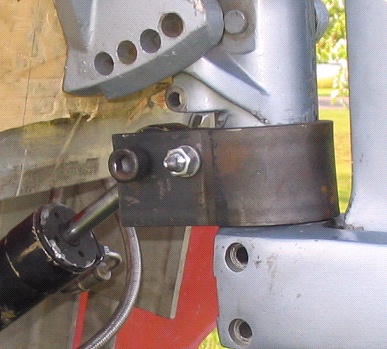
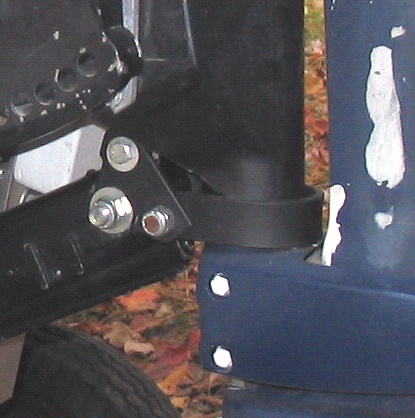
At right is one example of a homebuilt bracket, this one ingeniously based on a muffler clamp.
|

|
|
This bracket is simply piece of steel bent around the tilt bracket and bolted tight in place. The steel used appears to be 1.5" wide, and is wide enough to need no further bracing.
On the other hand, bending steel this stout might require some specialized tools or equipment.
|

|
|
My own bracket was made from lighter stuff, quite easily bent around the motor itself, or better yet around some other object just slightly smaller in diameter.
Below are the steps I used to create this bracket.
|

|
|
Meanwhile, the other end of your hydraulic cylinder has to be connected to you boat. If you have a jackplate on your boat, there will likely be enough room between your motor and transom to simply mount a simple bracket to the transom. A pair of lengths of aluminum angle are all that is required.
For motors mounted directly on the transom, a hole or slot may need to be cut through the transom. The cylinder passed through this opening and is attached to a bracket which is actually inside the boat.
|

|
|
A further refinement, for those who have, or plan to have, a jackplate, is to mount the forward end of the cylinder to the jackplate itself. The advantage is, as you adjust the vertical position of your motor, both ends of the cylinder move with it, and do not mess with the geometry of the system.
This bracket is included in my jackplate plans, available HERE
|

|
|
The "Dillon" Bracket
This is the basic structure: a piece of 3/16" x 1" x ~10" steel bent around the base of the swivel bracket assembly. A 3/8" bolt, or threaded rod, (longer than the one shown here) holds the bracket in place on the motor.
Another bolt connects the bracket to the hydraulic cylinder. The size of this bolt will depend on the cylinder you use. For my boat I used an older Mercury cylinder, which called for a 7/16" bolt.
|

|
|
The bracket wrapped around the bottom of the swivel assembly.
Drill the 3/8" holes as close to the swivel assembly as possible -- ideally so that the threaded rod (or bolt) is snug against the assembly.
(Note that the motor's entire tilt lock mechanism has been removed.)
|

|
|
Two short bracing pieces extend from the 7/16" bolt to two mounting points left over from the tilt lock mechanism.
|

|
|
A second pair of bracing pieces connect the 3/8" rod with the first pair. This triangulation makes the structure rigid.
A second option is to extend the second pair of bracing pieces up to the same mounting points as the first pair. You may have to notch the braces and/or bend them to make them fit if you choose this option.
|

|
|
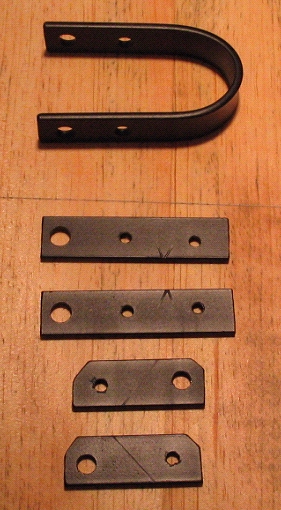
These are the five steel parts you have to create:
The U-shaped piece is about 10.5" long;
the long braces about 4";
the short braces about 2.5".
I used mild steel, available at my local hardware store. Stainless would be even better, probably.
|

|
|
Another development in GT Pro trim: Using a mechanical actuator in place of a hydraulic cylinder.
Brent Compton (from Customer Projects) tested his system and reports that it "worked great!"
A new Lenco actuator can be purchased for about $150. A pair of relays is all that's needed to complete the system.
See also this discussion on Boat Racing Facts.
|

|

