Steering
This steering wheel was bought cheap on eBay. I bolted it to a pulley wheel. The assembly locks to the steering shaft with the pulley wheel's set screw.
This 13 inch wheel, unfortunatly, tends to block my view of my instruments. I have an 11 inch wheel which is better for visibility, and gives me a bit more knee room. But I prefer the larger wheel for driving purposes.
You will find more information about my steering system on the front cowling page.

Steering bars on my Mini GT are made from 1/4" x 3" aluminum bar.

A simpler steering bar made from steel angle for my Tunnel Mite. Less substantial, but it passed racing inspection and performed perfectly in nine races in 2005.

This is a typical cable set-up. The cable dead ends at the steering bar on boats this size, rather than running through a block and then back to the boat. This gives you quick, easy steering. About 1/4 turn of the wheel either way is all I get, or need.
Note the two cable clamps, one at the thimble, the other a foot or two away with a couple of half-hitches between. There are NO SPRINGS anywhere in the system.

Dashboard
At right is a Tiny Tach tachometer. If you get one of these, be sure to order model "1C" for your two-stroke, two cylinder motor. Get it with at least fifteen feet of cable. Also, be careful buying a used Tiny Tach. They have an internal battery (supposed to be good for seven years, I think) that cannot be replaced when it dies.
In the middle is an old-fashioned mechanical speedometer. Most people use GPS these days, which is probably why speedometers like this go for cheap on eBay. My set-up for the pitot is seen in the next photo. Install it on the deepest part of the sponson that the drain plug will allow. Don't forget to tilt ut up on race day!!
Speedo and tach are your two critical intruments. They will tell you what is going on as you adjust your set-up and dial it in for top performance.
On the left is a water pressure gauge. I put one on my first boat because I wanted to know what was happening as I jacked the motor up higher and higher and the water intake got closer to the surface. In fact, I always got 20 to 22 lbs. water pressure at wide open throttle. I could have gone without this time around, but it looks good on the dash so what the heck.
Below that is the start button. Still lower are the kill switch, and the on/off toggle.
The Hot Foot throttle is also visible. This one is mounted on the optional slide plate for fore-and-aft adjustment. The slide plate is bolted to a small plywood floorboard, which in turn is screwed down to two of the oak tunnel battens.


Fuel and Battery
The fuel tank and battery are securely bolted to a plywood floorboard. The floorboard is screwed down to the oak tunnel battens. I believe I used at least 15 screws to hold this stuff down.
Right under here is where the tunnel boat meets the water. When you feel that wave slam into your boat, it is hitting right under your seat, your gas tank and battery -- almost all the heavy stuff.

Jack Plate
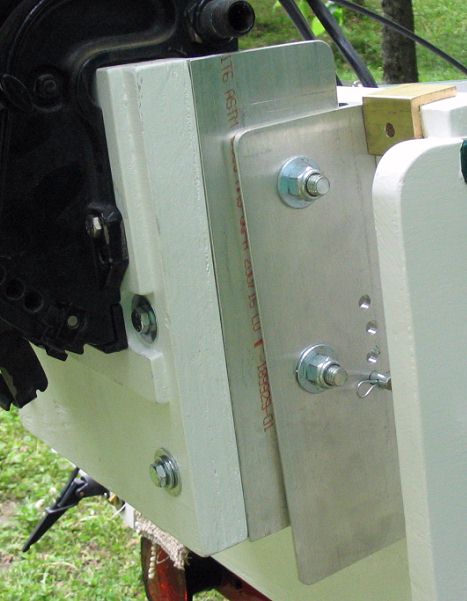
You won't want to go without a jack plate. Engine height and tilt are the two main adjustments you have on this boat. It also moves your engine back a few inches. A little "set back" positions your prop a little farther from the boat, into less turbulent water.
This jack plate is home-built from four pieces of 4" x 4" x 12" aluminum angle, a plywood motorboard and some nuts and bolts. It gives me 3 inches of vertical adjustment, 6 inches of set-back and weighs about 18 lbs.
You will plans for this jack plate HERE.
Note that the motor is bolted to the jack plate motorboard. Required for racing.

Gearshift
I bought a gearshift and cable, mounted the shifter on its own floorboard, and then went the low-tech route. Racing boats only really need forward anyway, and this works fine when needed. The rod gets in the way a bit when you tilt the motor, however.
